Control command library
The command library holds all available commands that are sent towards the device(s). It’s been split up in different groups that can be selected when adding a device to the control configuration. Some of the command groups are created by GoBright and can be used in general for a couple of devices.
Customize commands
The real benefit of command groups is to be able to create custom commands for specific devices. These can be added by using the ‘+’ button next to the Groups subheader or using the ‘copy’ button when a group has been selected.
General
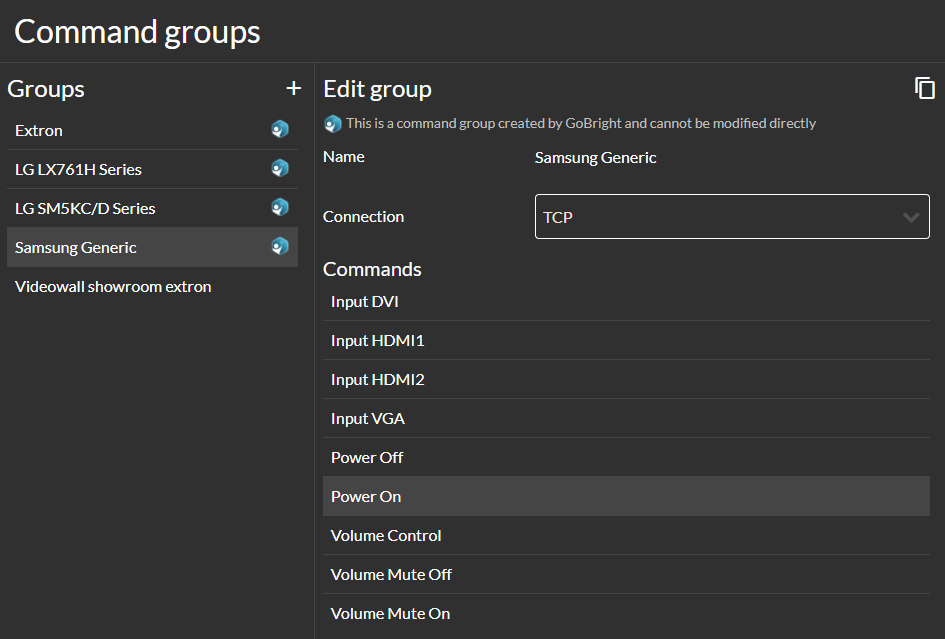
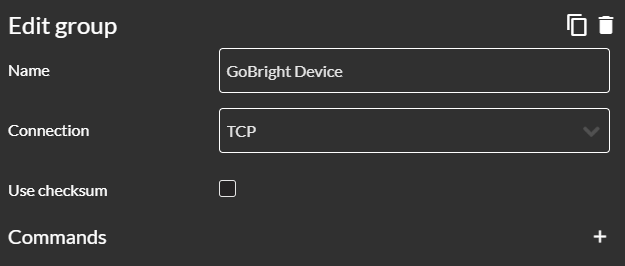
Each group has a name that will appear in the list on the left-hand side. The groups that are predefined by GoBright can be recognized by the GoBright Logo on the left side of the title. These predefined groups cannot be altered, but it’s possible to copy them and create a new group with their commands.
The connection can be set on either TCP or HTTP and depends on the device that is used. The ‘use checksum’ checkbox decides whether commands need a checksum to be able to function properly. Please note that only a few checksum calculations are currently supported.
Commands
Under the name and connection is a list that displays all the commands within the group. New commands can be added by using the ‘+’ button or existing ones that can be altered by selecting one from the list. When the command is being edited the options are configured on the right-hand side of the screen.
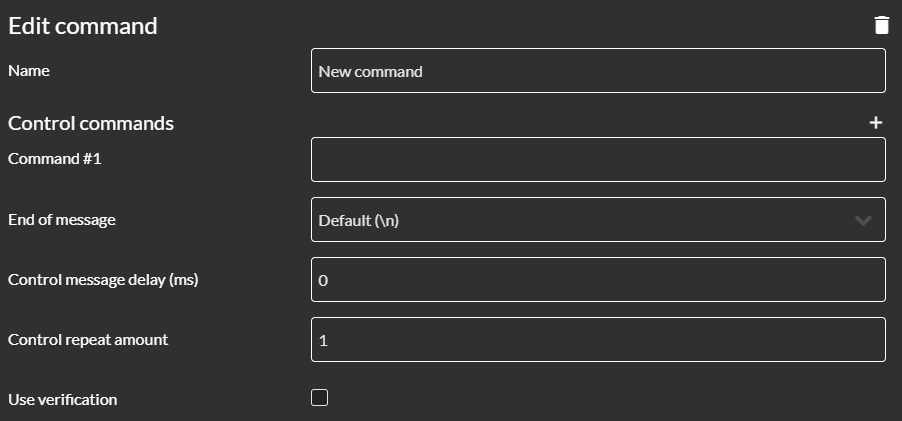
Enter a command or series of commands by using the ‘+’ button. When entering multiple commands these will be sent in sequential order from top to bottom. After each command, the end of message character is used to identify when a response has been fully received.
Message delay will delay a command by an entered amount of milliseconds. Commands can be sent repeatedly towards the device. The last option is a checkbox that can be used for verification which will delve into deeper in the next section.
Verification
By using verification it’s possible to retrieve the status of a device and this, in turn, forms the basis for two way communication between the GoBright platform and the device. Verification commands will execute every 5 seconds to identify any changes on the device, e.g. a volume change using a remote control. This is helpful for making sure what the state of the device is.
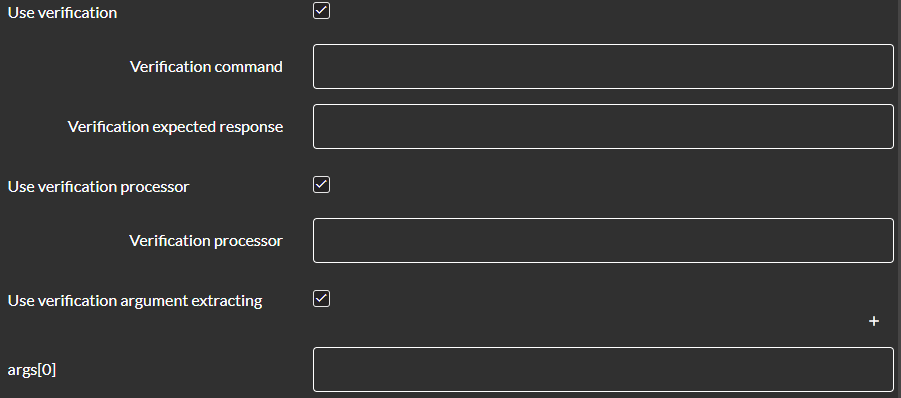
Each command can trigger one verification command and expected a response. The verification processor checks in which part the expected response can be found by using JavaScript on the ‘result’ the device will send.
Lastly the checkbox ‘use verification argument extracting’ can be checked. Verification argument extraction is only useful for commands that require an argument. For most (if not all) devices this only means the volume level. This retrieves an argument from the original command, that must be named ‘args[0]’, and uses it in the verification process. This is highly customizable but sensitive for errors when the incorrect strings are entered. Let’s look at an example from the LG TV that uses the volume control command.
Example – LG TV Volume Control
To demonstrate how commands and verification work we use the LG TV as an example. Below is the full command for Volume Control which changes by either using the slider on the control panel or using the remote from the TV. By using verification both volume settings are constantly in sync with each other.
Volume Control Command
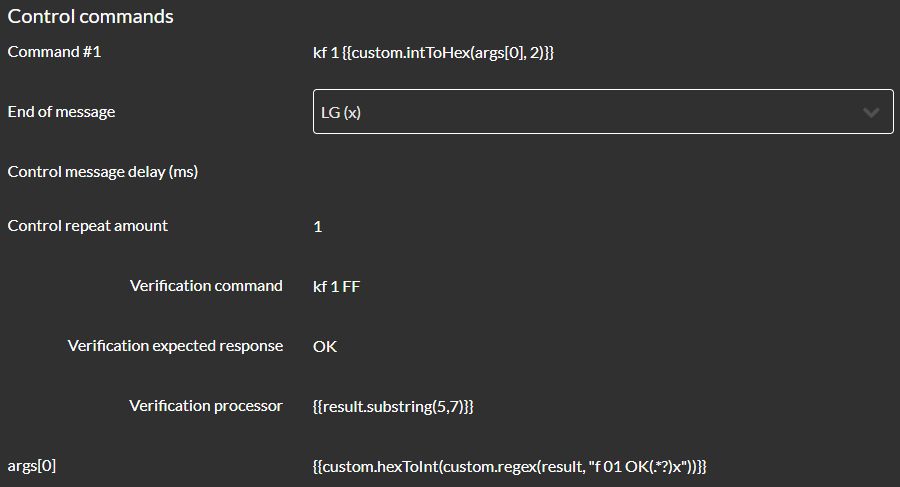
The full (RS232) command to set the volume control on the LG TV is ‘kf 1 {}’. The first part ‘kf 1’ is the beginning of almost every command that is used by the LG series. Because it only accepts hexadecimal strings we are converting the next part with ‘custom.intToHex’. The last part ‘(args[0], 2)’ sets the volume to a certain value.
All LG commands end with an ‘x’ that has been set in the ‘End of message’ field. There is no message delay and the command will only be sent once.
Verification
The verification command retrieves the status from the device. In this case, the command ‘kf 1 FF’ checks the current volume from the LG TV. That means as soon as the command is sent it immediately retrieves the status.
The expected response is ‘OK’ which is part of the result when the status is retrieved. This part of the result is extracted by using the ‘{}’ function. This only reads the string from the 6th until the 8th character and checks it with the expected response.
The final function makes use of an argument (args[0]) that sets it so it can be used within the command. It needs to be an integer so the first part of the function ‘custom.hexToInt’ converts the retrieved hexadecimal into an integer. The middle part uses a regex call which is used to filter a certain part of the result ‘custom.regex’. The final part uses regex to search for the volume height which is shown after the ‘f 01 OK’ part and before the ‘x’.
To sum up what happens:
- The verification command is sent every 5 seconds
- The processor executes any string manipulations like a substring or a decimal to hexadecimal conversion
- The response of the device is checked against an expected response , if the response equals the expected response, the user interface will update to this state
- The processor checks a part of the result
- The argument extractor extracts the argument and sends it to the user interface (e.g. the volume level is sent to the user interface)