Fargo DTC1250e via network (Cable)
This guide describes the installation and configuration of the Fargo DTC1250e card printer, for usage with the digital reception kiosk.
Step 1: Unboxing & network configuration of the DTC1250e printer
- Unbox the DTC1250e printer from the box.
- Unbox the printable cards
- Load the card(s) in the input hopper.
- Insert the print ribbon cartridge in the printer.
- Power the printer via the poweradapter.
- Connect the printer with a network cable.
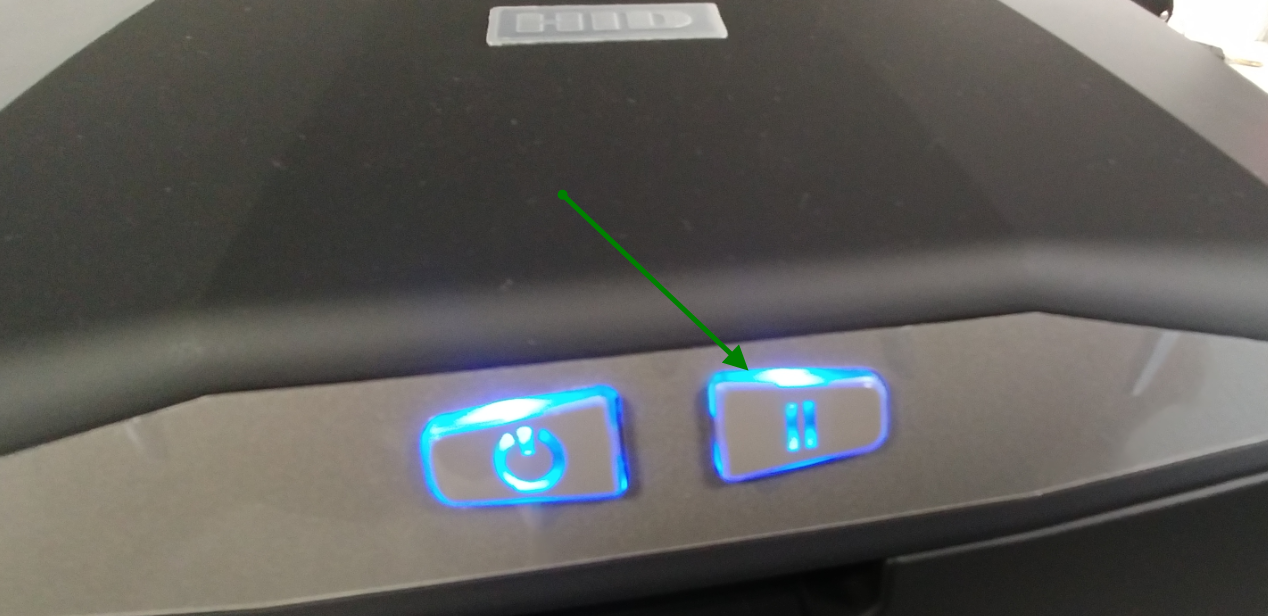
- Wait until both buttons have continues blue lights.
- Press and hold the right “pause/resume” button for five seconds, or until the printer starts to print.
- The printed card will provide the printer’s MAC address and IP address along with other advanced printer information.
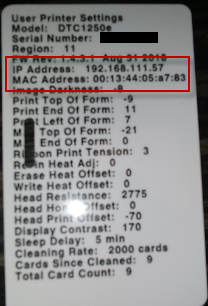
- The printer must have a static IP address.
It is recommended to give the printer a static IP address via a MAC address reservation in your DHCP-server.
Please do so with the MAC address you see on the printed card. - The static IP address of the printer is needed in step 2
- Default username of the printer is “root”, password [no password]
Step 2: Installation of the printer driver
Now it is needed to install the correct driver for the Fargo DTC1250e on your Windows server.
You can download the latest driver from the HID Global website.
Install the printer as a local netwerk printer.
During the installation process the installation software will ask you for the IP address of the printer, this is the IP address you have configured during the previous step.
Step 3: Find the name of printer
In step 2 you have installed the printer in Windows.
Now you need to find the name of the printer you have installed:
- Open “Control Panel”
- Open “Devices and Printers”
- Double click on the “DTC1250e Card Printer”
- In the menubar click on “Printer” followed by “Properties”
- In the tab “General” you can find exact name of the installed printer.
- Please copy this name to use in the next step.
Step 4: Installation of the Badge Printing Service
Follow the next article to install the Badge Printing Service, and configure the device to work with the kiosk:
Setting up badge printing: via intermediate Windows Service
Troubleshooting
Card is printed half (until the clip opening)
Some cards have an opening for a keycord or a clip.
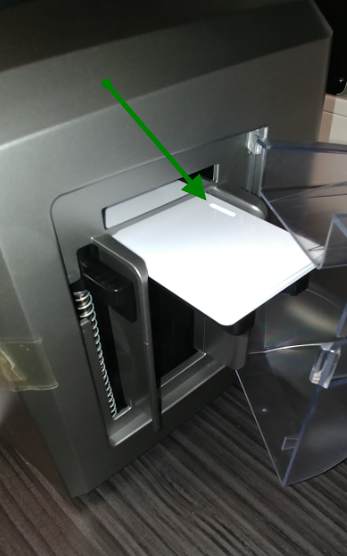
If the card is not fully printed, and only printed until the opening, you need to change te position of the cards in the input hopper.
The printer has a sensor that checks whether the end of the card has been reached. Because these cards contain an opening at the top (to attach a keycord or clip, )the printer registers it as the end of the card.
This sensor is only on the front of the printer, make sure that the opening on the card is on the back:
Printed text/images on the card is too dark or too light
Different cards have different coatings, which influence the print quality.
For example, pre-printed cards have another coating then a standard blanc card.
In the printer driver on the Windows server you can change the ‘Resin Heat Adjust’ value, which changes this behavior.
To change driver settings:
- Log in to the Windows server where the printer driver is installed
- Right click on the printer driver icon in the Printers Folder and select “Document Defaults”.
- Open the tab “Card”
- Click on “ToolBox”
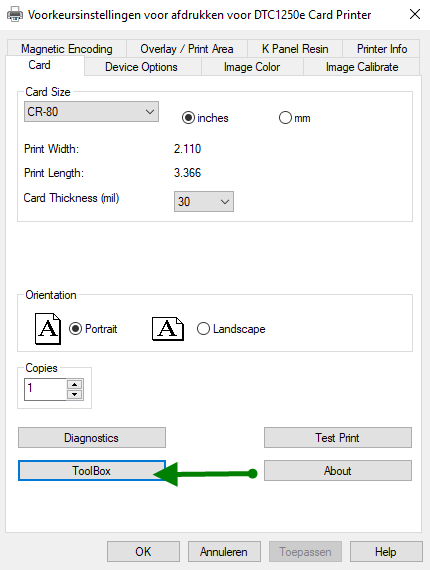
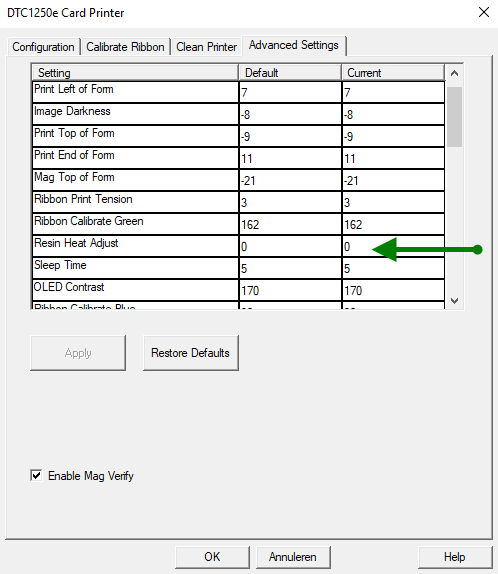
- Open the Tab ‘Advanced Settings’
- Change the value ‘Resin Heat Adjust’ to value between from 0 to -20.
Please save the adjusted setting and test the newly printed card. Keep changing it until you reach the desired quality.
(as different cards have different coatings, there is no standard value, but in normal circumstances the ‘Resin Heat Adjust’ value should be between 0 and -20)