Visit Badge Configurations
Visitor badges help you recognize visitors when they are in the building, and provide a convenient way for the visitor to sign out via the qr-code. The visitor can even re-use his badge, and check-in fast.
The badge can be designed within the visitor registration configuration, and for within each visitor type you can choose which badge to print.
Visitor badges always exist within a visitor registration configuration, if you need more general information about that, please proceed to the visitor registration configuration article.
Preparations
Before you can print badges, you need a badge printer to be able to print. Proceed to the setting up badge printing article.
The printer and supplies define the size you can print, and it is very important to know exactly what can and cannot be printed, and what size can be printed.
If printing with incorrect settings (for example: incorrect size), the printer might show errors or might print in funny ways.
If you have a general design of the badge which need to be printed (for example a company logo), you can load a background image. You should use a JPG image with the size of 857 px x 539 px if you use a creditcard format badge of 85,7 mm x 53,9 mm.
The badge printing functionality only supports single sided printing.
Manage visitor badges
Log in to the GoBright portal with your manager account, and choose Settings > Visit > Configurations > Open your configuration >Left navigation: Select Badge .
Add a new badge by clicking on ‘+ Add’ at the left navigation bar or select your badge to configure.
Modifying a visitor badge
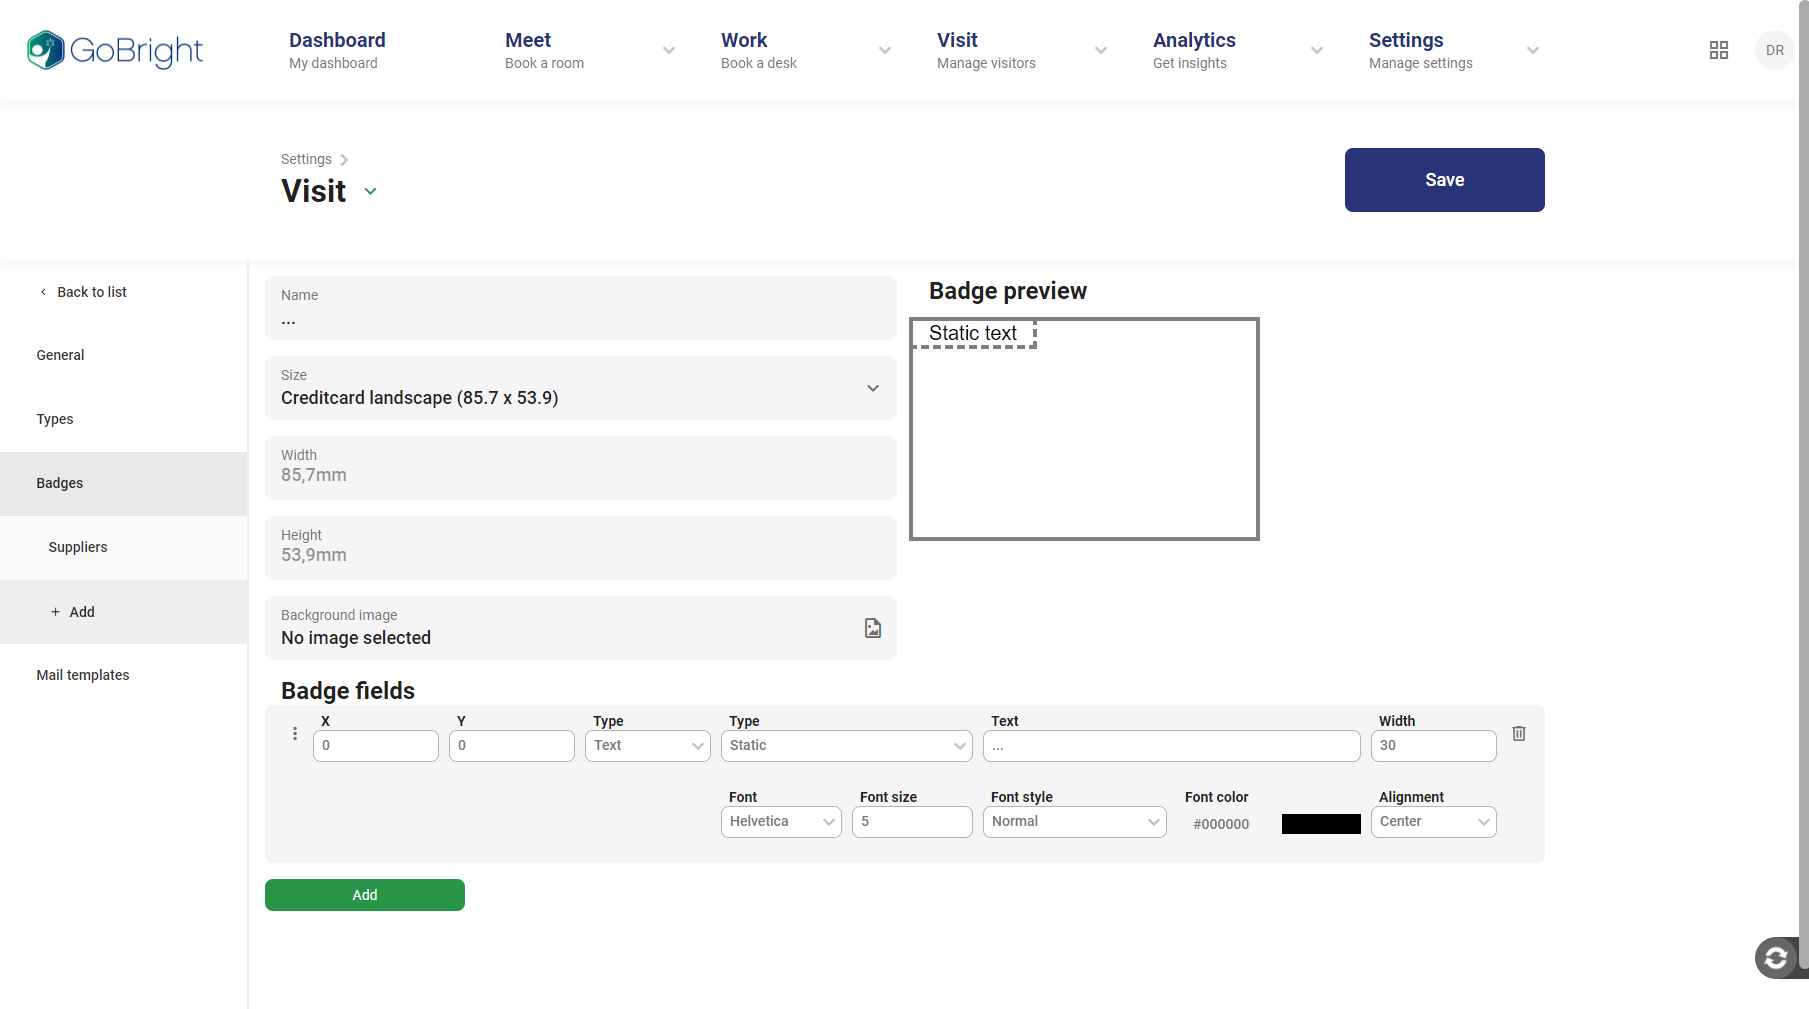
General configuration
The badge has a name, with this name you can select this badge in the visitor type configuration.
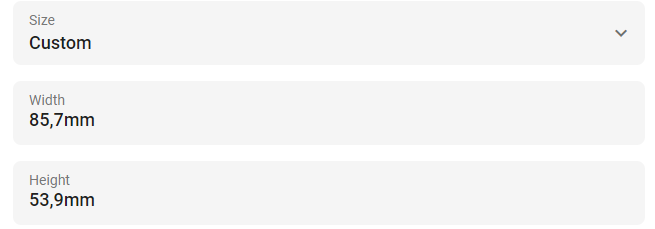
Size
The size is defining the size you can design, and the size which is used for printing. This must be set correctly to the millimeter, otherwise your printer might not print at all. By default it’s creditcard landscape 85.7 X 53.9.
A couple of printers, such as the Brother QL-820NWB, support custom length paper tape. It’s possible to create a custom size badge when adjusting the following settings. You can add custom width and height by selecting Size drop down field > Custom.
Background image
‘Background image’ allows you to load an image as a background for the badge. You should use a JPG image with the size of 857 px x 539 px if you use a creditcard format badge of 85,7 mm x 53,9 mm.
Badge fields
You can create fields with content to be printed at specific positions on the badge.
Each field can be configured with a position, size and type.
The following types of badge fields are available:
- Type
- Photo: the photo of the visitor
- QR code: a QR code, which can be used for sign out, and for fast sign in when returning.
- Text
- Type
- ‘Type’: The name of the visitor type
- ‘Field’: One of the fields the visitor filled
- ‘Host’: The name of the host the visitor chooses
- ‘Location’: The location where the visitor registered
- ‘Static’: A static custom text
- ‘Current date’: The date of printing of the badge
- ‘Current date & time’: The date and time of printing of the badge
Depending on your Type selection the data fields will change.
Next
Proceed to the visit mail templates configurations to get the details about designing your mail templates.