Configure SAML in AD FS
This guide describes the steps required to create a working SAML integration between GoBright and AD FS.
Create the Relying Party Trust for the GoBright platform
- Login to your AD FS server
- Start the AD FS management console
- Select ‘Relying Party Trust’ in the left-hand treeview, and ‘Add Relying Party Trust…’ in the Actions panel.
In the ‘Add Relying Party Trust Wizard’, choose ‘Claims aware’, and click ‘Start’.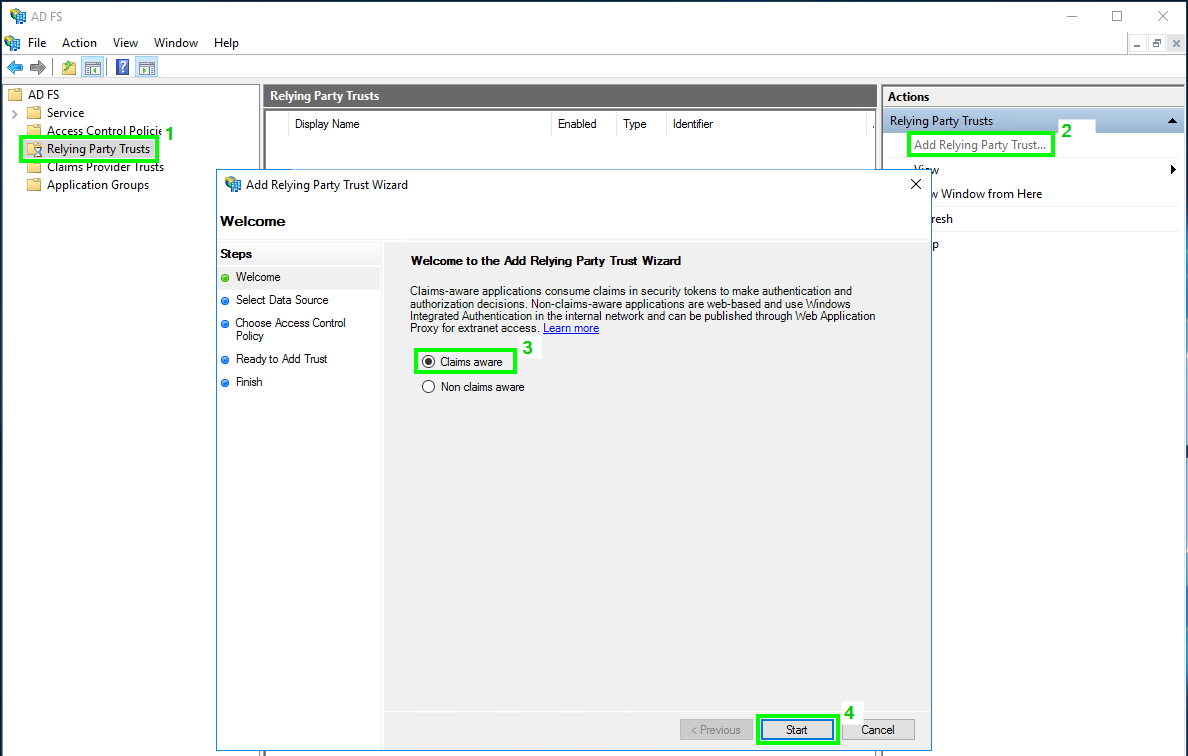
- In ‘Select Data Source’, select ‘Enter data about the relying party manually’.
Then click ‘Next’.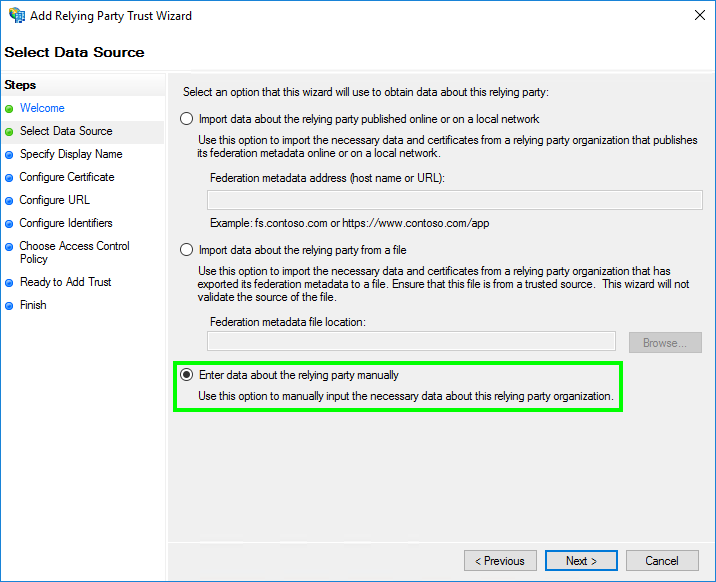
- In ‘Specify Display Name’, fill ‘Display name’ with ‘GoBright‘.
Then click ‘Next’.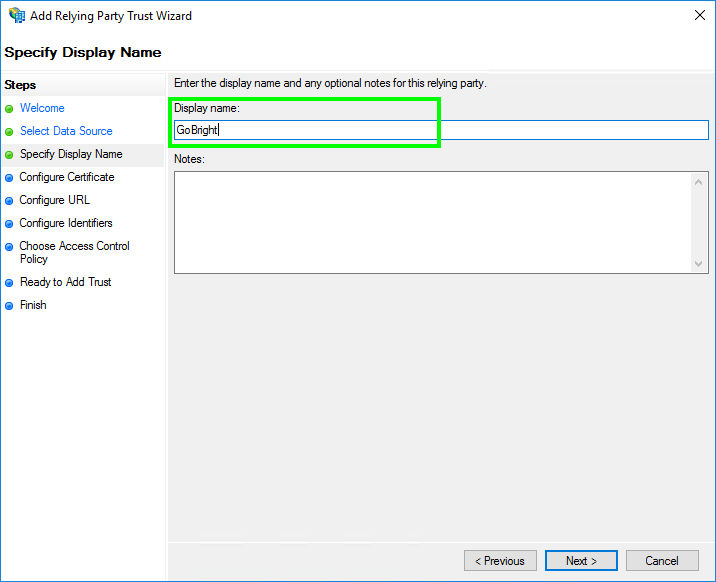
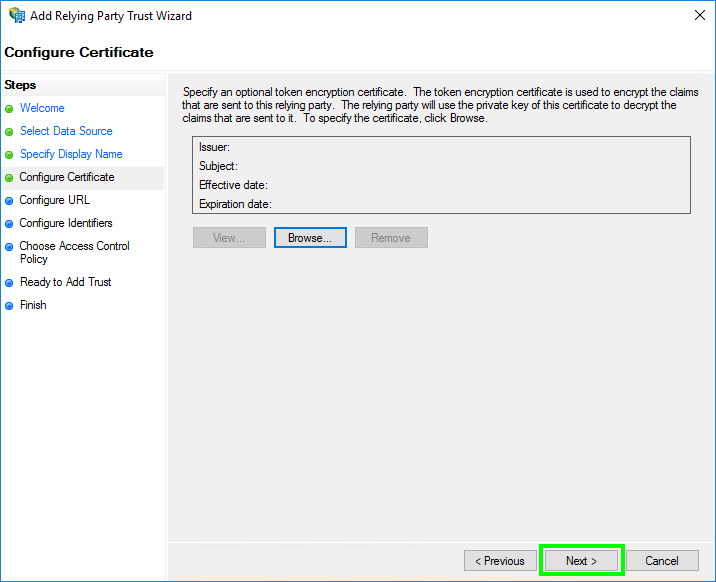
- In ‘Configure Certificate’, click ‘Next’.
- In ‘Configure URL’, select ‘Enable support for the SAML 2.0 WebSSO protocol’.
Fill the ‘Relying party SAML 2.0 SSO service URL’ with the ‘Reply URL (Assertion Consumer Service URL)‘ which you have found in step 1.
Then click ‘Next’.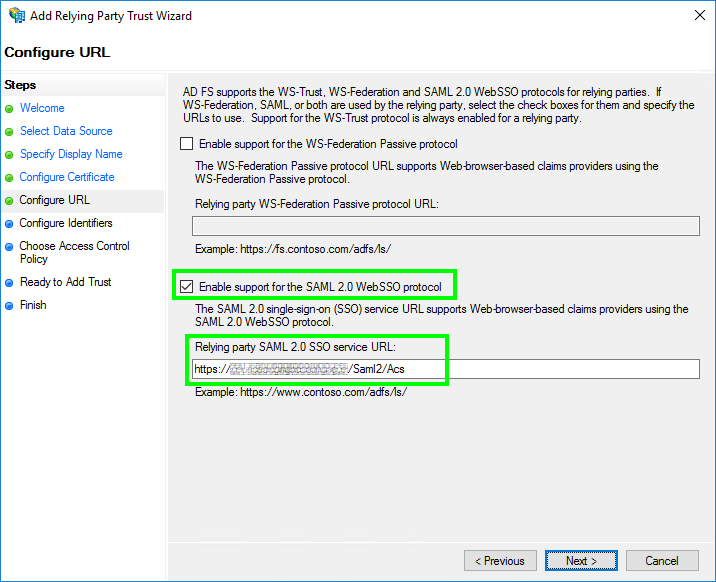
- In ‘Configure Identifiers’:
Fill the ‘Relying party trust identifier’ with: ‘Relying party identifier / Entity Id‘
Then click ‘Add’ and click ‘Next’.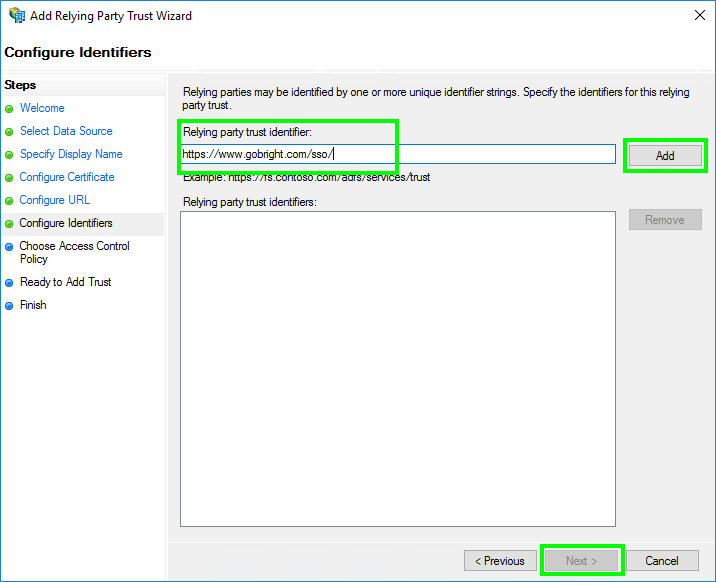
- In ‘Choose Access Control Policy’, you can configure who you want to have access to GoBright. Make sure that you have (at the very least) access with the account you will use to test the SAML integration.
Then click ‘Next’.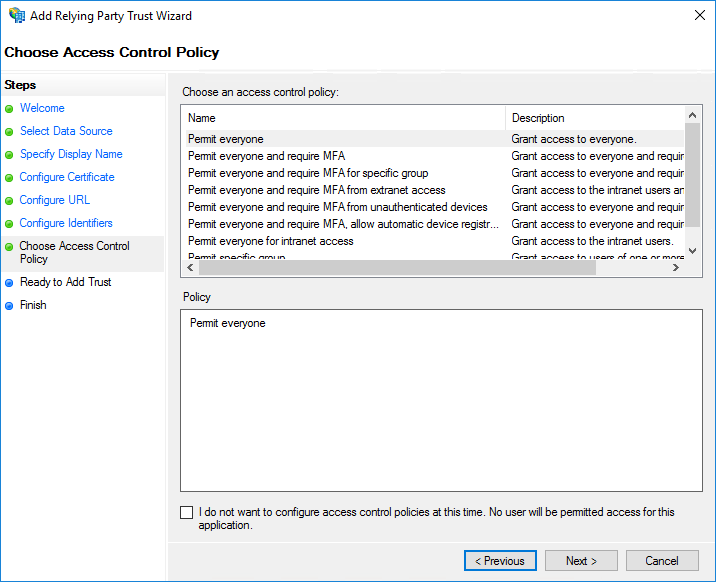
- In ‘Ready to Add Trust’, you can review the settings and click ‘Next’.
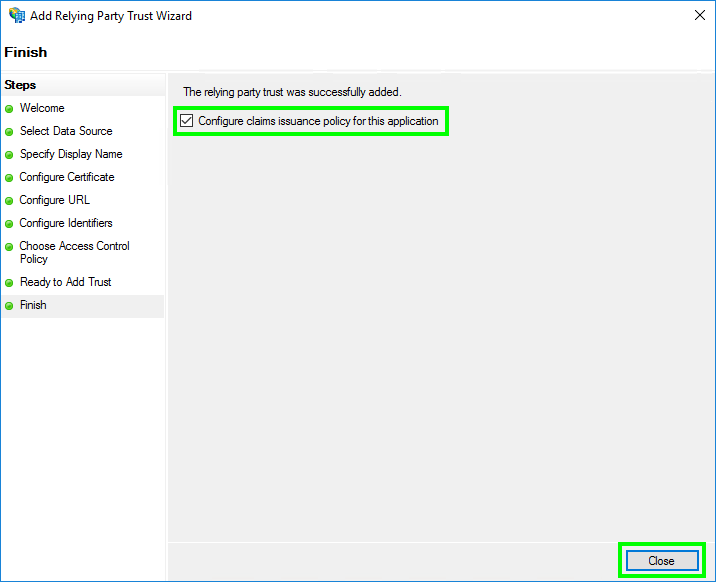
- In ‘Finish’, check ‘Configure claims issuance policy for this application’ click ‘Close’.
Configure the Claims Issuance Policy
- Open the Claims Issuance Policy properties (if it is not already open):
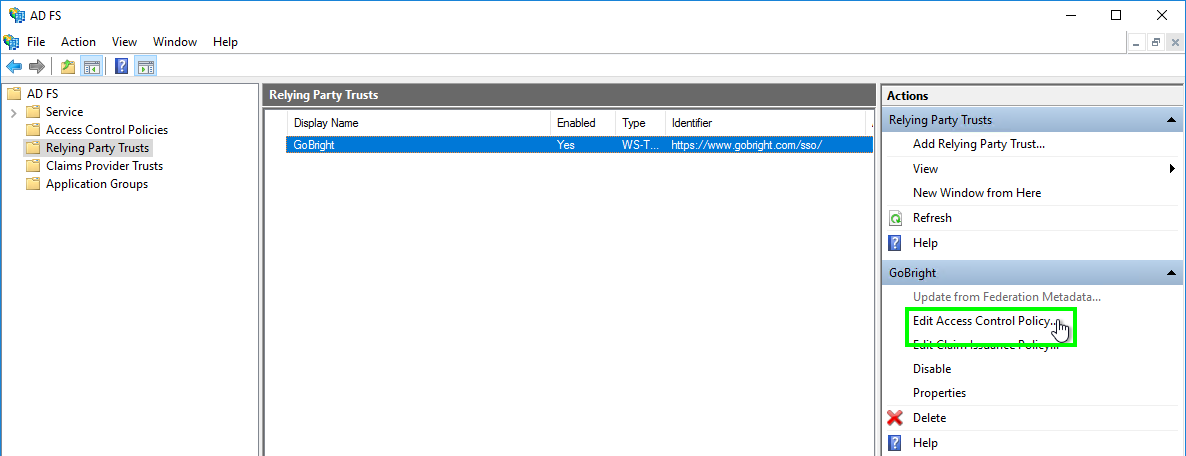
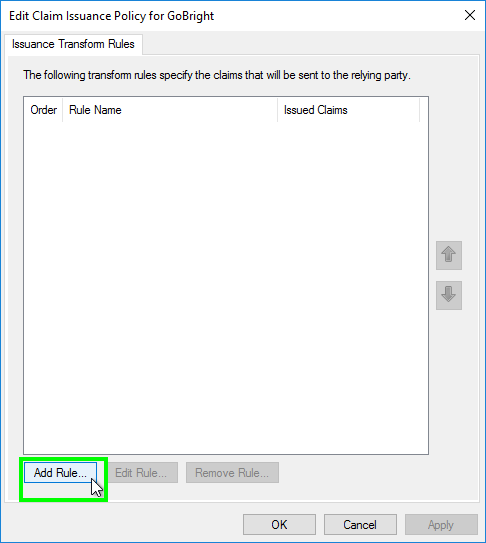
- Choose ‘Add Rule…’:
- The ‘Add Transform Claim Rule Wizard’ opens.
Choose as ‘Claim rule template’ the option ‘Send LDAP Attributes as Claims.
Then click ‘Next’.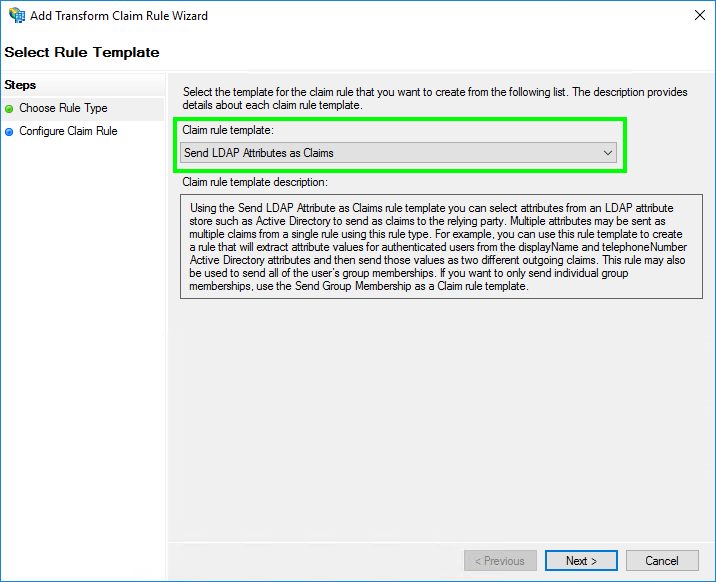
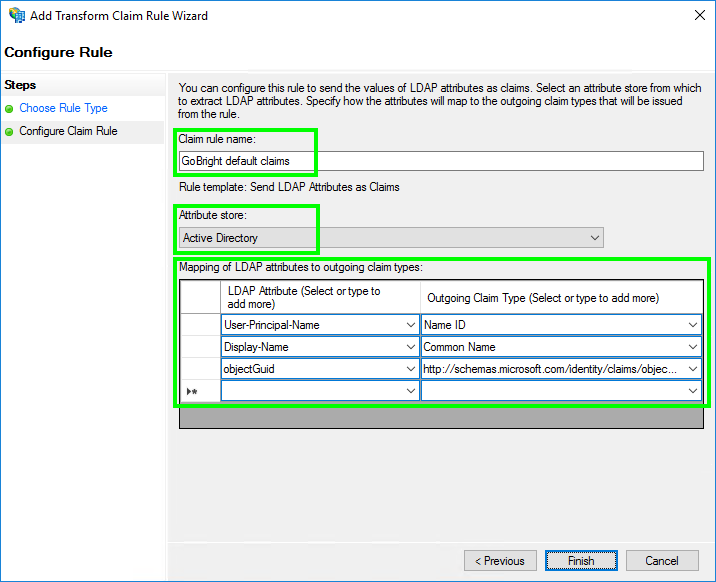
- Now configure the claim rule:
– Set the ‘Claim rule name’ to: GoBright default claims
– Set the ‘Attribute store’ to: Active Directory
– Configure the ‘Mapping of LDAP attributes to outgoing claim types’ with the exact values:
(please copy-paste the values)
LDAP Attribute Outgoing Claim Type Required User-Principal-Name Name ID yes Display-Name Common Name yes objectGuid http://schemas.microsoft.com/identity/claims/objectidentifier yes [your pincode attribute] gobright.pincode no [your nfc attribute] gobright.nfc no [your default costcenter attribute] gobright.defaultcostcenteridorname no Note: the Outgoing Claim Type ‘Name ID’ will be used as the email address of the user in GoBright. It is important that this is the primary email address of the users mailbox. In most cases the User Principle Name is the same as the primary email address, but for your specific case this might be different.
- Then click ‘Finish’ and click ‘OK’
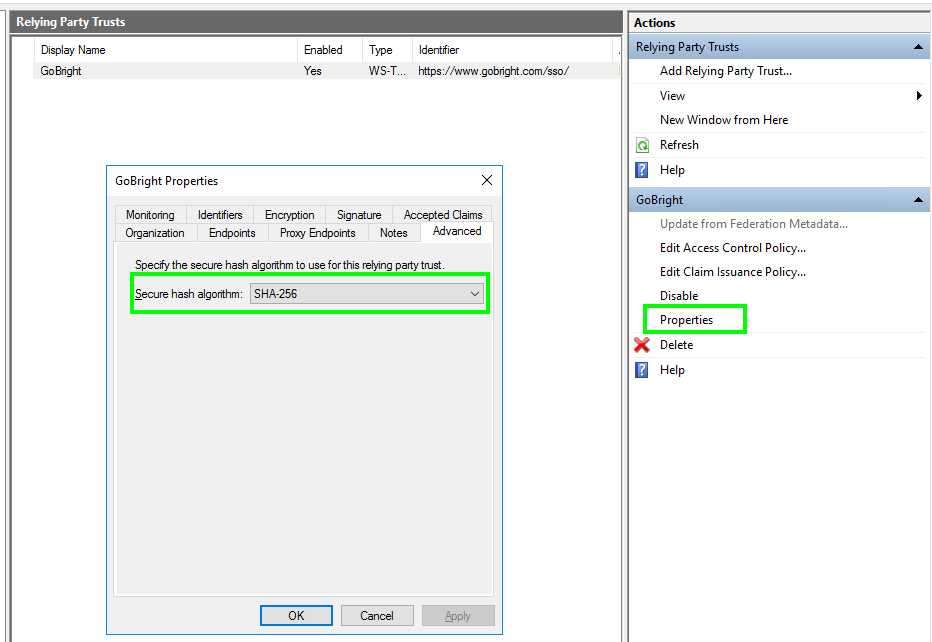
Configure the Secure Hash Algorithm
- Please confirm the ‘Secure hash Algorithm’ is set to ‘SHA-256’ by following these steps.
- Open the Properties of the ‘GoBright’ Relying Party Trusts
- Open the tab ‘Advanced’
- Set the ‘Secure hash Algorithm’ to ‘SHA-256’ if it is not already
- Click ‘OK’
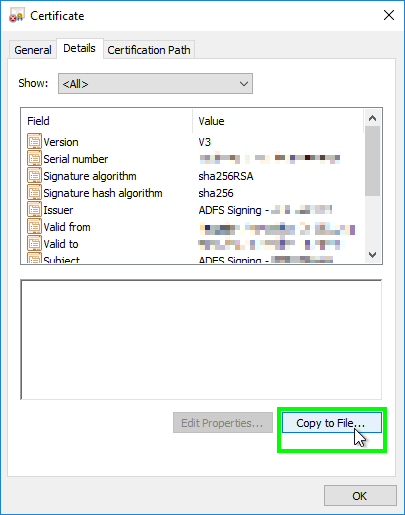
Copy the token-signing certificate
- In the AD FS management console, select ‘Certificates’ in the left-hand treeview
- Right click the active ‘Token-signing’ certificate
- Select ‘View Certificate’

- Select the ‘Details’ tab and choose ‘Copy to File…’
- The ‘Certificate Export Wizard’ opens, click ‘Next’.
Select ‘Base-64 encoded X.509 (.CER)’ and click ‘Next’.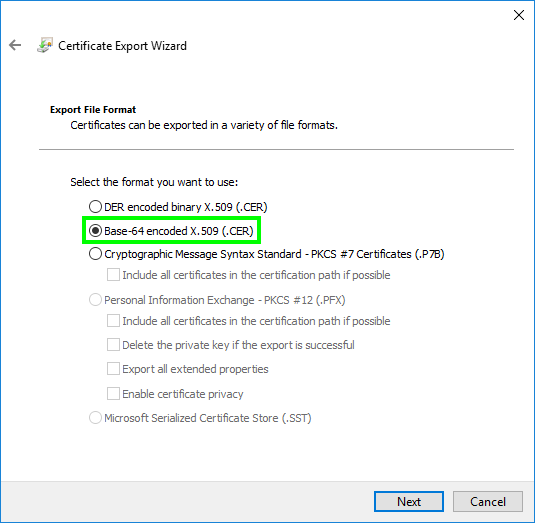
- Save the file to a location of your preference, for example in ‘C:tokencertificate.cer‘
- Click ‘Next’ and ‘Finish’.
- Now open ‘Notepad’ and load the exported certificate (for example ‘C:tokencertificate.cer‘).
- You will now see the text contents, in the following format:
-----BEGIN CERTIFICATE-----
..........DATA.............
-----END CERTIFICATE-----
You will need this in step 3 to configure the GoBright portal.
Determine the AD FS service url's
Please determine the service url’s of your AD FS installation.
Determine the ‘Single Sign-on service url’:
- Mostly the ‘Single Sign-on service url’ is in the following format:
https://[adfs service url, e.g. adfs.company.com]/adfs/ls - A real world example would be:
https://adfs.company.com/adfs/ls
Determine the ‘Single Logout service url’:
- The ‘Single Logout service url’ is the ‘Single Sign-on service url’, plus the following extension:
/?wa=wsignout1.0 - The full format would then be:
https://[adfs service url, e.g. adfs.company.com]/adfs/ls/?wa=wsignout1.0 - A real world example would be:
https://adfs.company.com/adfs/ls/?wa=wsignout1.0
You will need this information in step 3 to configure the GoBright portal.
Next
Proceed to step 3 of the SAML2 federated identity integration article and finish your SAML integration.