Power BI Service Principals (Beta)
This guide will explain which steps are needed in order to successfully use the View Power BI Embedding widget.
If you’d like to use PowerShell scripts or learn more, check out the official article from Microsoft. Check the following article Embed service principal for more information.
Note: This article is created based on the help center article from Microsoft.
Supported devices
The Power BI Widget can be used on Windows or Android but should not be used in webOS devices. WebOS devices have a limited support for browser features (more information), therefore the Power BI widgets might stop working if Microsoft updates Power BI.
Step 1 - Create a Microsoft Entra app
Sign in to the Azure portal.
Search for and select App registrations.
Select New registration.
Fill in the required information:
- Name – Enter a name for your application.
- Supported account types – Select supported account types.
- (Optional) Redirect URI – Enter a URI if needed.
Select Register.
After you register your app, the Application ID is available from the Overview tab. Copy and save the Application ID for later use.
Select Certificates & secrets.
Select New client secret.
In the Add a client secret window, enter a description, specify when you want the client secret to expire, and select Add.
Copy and save the client secret value.
Note: After you leave this window, the client secret value is hidden, and you can’t view or copy it again.
Step 2 - Create a Microsoft Entra security group
Your service principal doesn’t have access to any of your Power BI content and APIs. To give the service principal access, create a security group in Microsoft Entra ID. Then add the service principal you created to that security group.
Note: If you want to enable service principal access for the entire organization, skip this step. To create an Azure security group manually, follow the instructions in Create a basic group. Don’t add members to the group at this time.
Step 3 - Enable the Power BI service admin settings
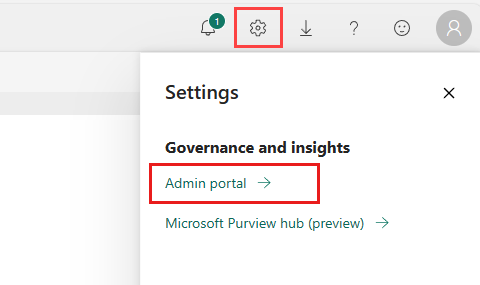
Open the Power BI admin portal by clicking settings and then Admin portal.
In the Power BI Admin portal go to tenant settings and scroll down to developer settings.
For a Microsoft Entra app to access the Power BI content and APIs, a Power BI admin needs to enable the following settings:
- Embed content in apps
- Allow service principals to use Power BI APIs
- Enable Embed content in apps either for the entire organization or for the specific security group you created in Microsoft Entra ID.
- Enable Allow service principals to use Power BI APIs either for the entire organization or for the specific security group you created in Microsoft Entra ID.
Important: Service principals have access to any tenant settings they’re enabled for. Depending on your admin settings, this includes specific security groups or the entire organization. To restrict service principal access to specific tenant settings, allow access only to specific security groups. Alternatively, you can create a dedicated security group for service principals and exclude it from the desired tenant settings.
Step 4 - Add the service principal to your workspace
Your Microsoft Entra app can access your Power BI reports, dashboards, and semantic models only when it has access to your Power BI workspace as a member or admin. You provide that access by adding the app’s service principal or its security group to your workspace.
In the Power BI service, scroll to the workspace you want to enable access for. From its More menu, select Workspace access.
In the Access pane, under Add admins, members, or contributors, add one of the following:
- Your service principal. The name of your service principal is the Display name of your Microsoft Entra app, as it appears in your Microsoft Entra app’s overview tab.
- The security group that includes your service principal.
On the dropdown menu, select Member or Admin.
Select Add.
Step 5 - Embed your content
You can embed your content within a sample application, or within your own application.
After your content is embedded, you’re ready to move to production.
Note: To secure your content by using a certificate, follow the steps described in Embed Power BI content with service principal and a certificate.
Step 6 - Publish the Power BI report
Now you can publish your Power BI Report. Make sure it’s within the workspace mentioned in the previous step.
Within View:
- Create a new template or slide and add the Power BI widget
-
Open the widget parameters and enter all the information gathered
Azure Tenant ID: The administrator within the Azure environment has to find this token in the portal.
Azure Client ID (application ID) : The application token which has been created before in step 1
Client secret Value: The client secret value has been created in the first step. (The Client Secret Value always contains ~ (tildes).
Input URL : The direct link of a dashboard/report within a workspace.
- Save the template and add it to a playlist.
Place the report in a workspace to get the required URL.
Loading times
Reports can take quite a while to load, especially on slower hardware. Because of this we recommend to set the play time of a slide containing the Power BI widget to at least one minute. Each time the widget plays, the entire report loads again.
Azure policies
If you’ve followed this guide and still no Power BI report is loading within the GoBright View Portal: Please check for any active policies in Azure which may block access.